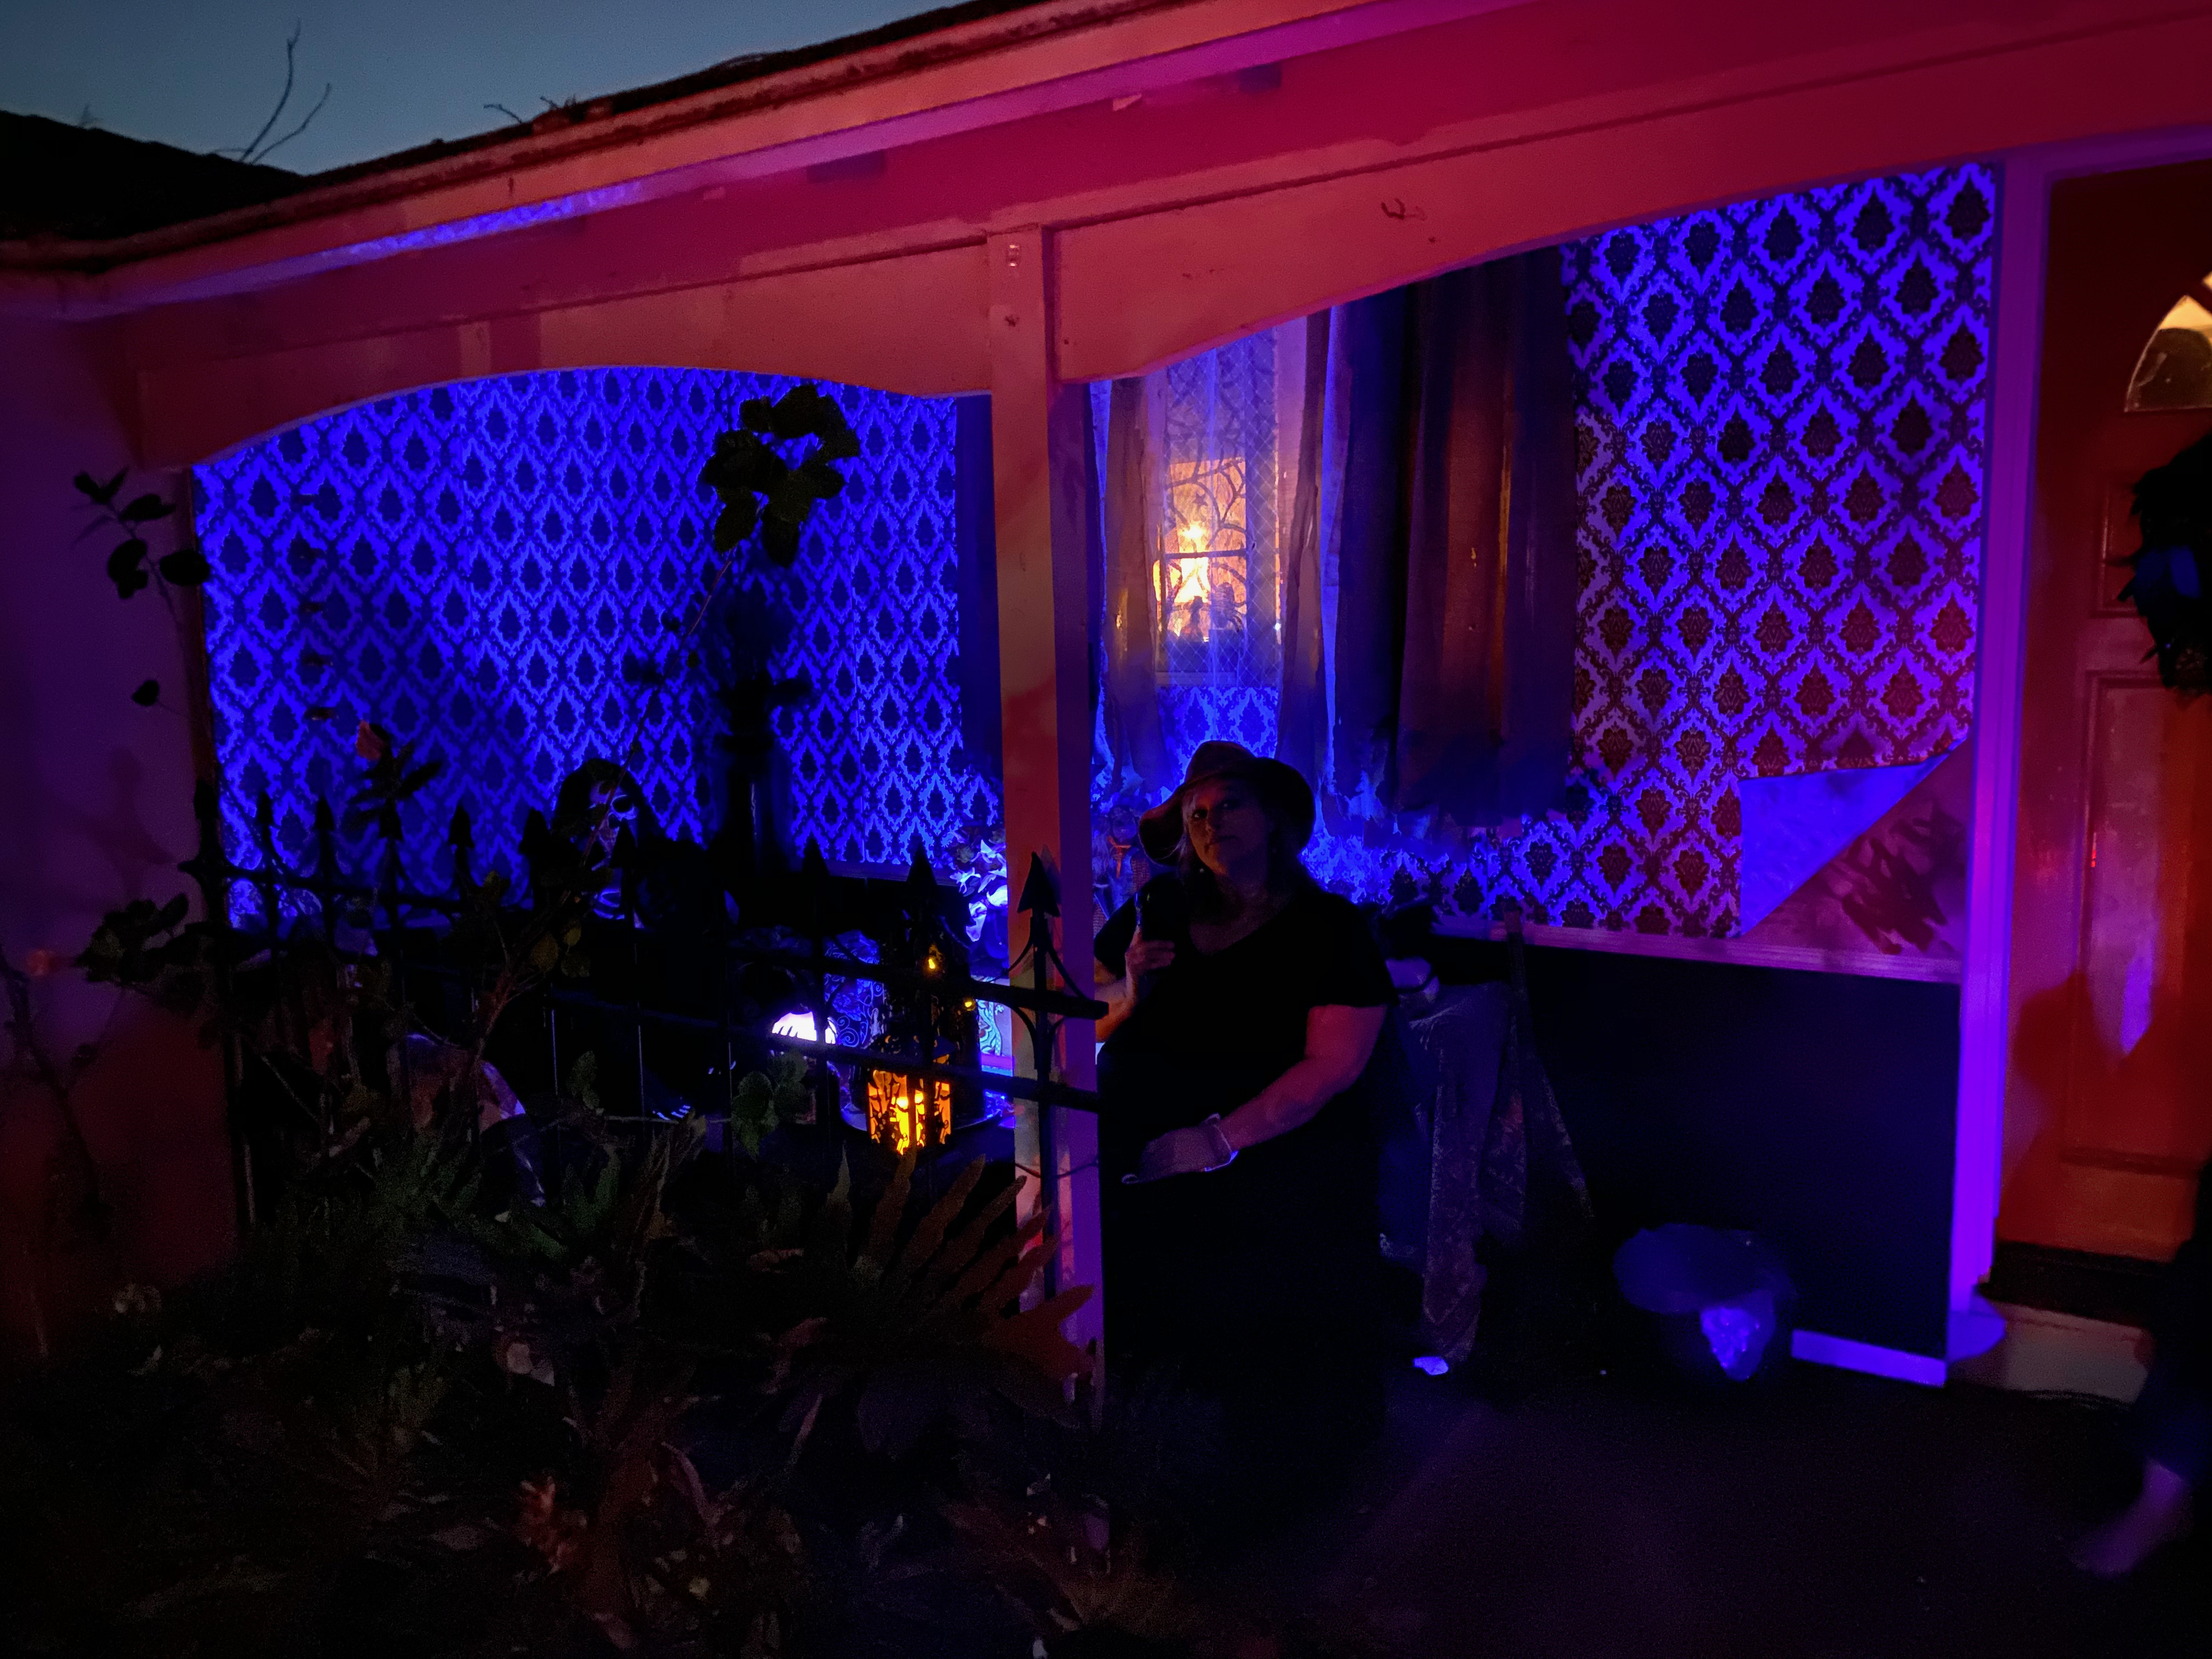
Like my father, I enjoy tinkering and fixing things and to that end I have accumulated quite a number of tools over the years. When I lived in Nashville I fashioned the garage into a modest workshop. I built workbenches and storage and worked on a number of handyman type projects around the house over the years. Then in 2019 I got offered a job that had me moving across the country to California. We rented a couple of different houses over the first few years but I never really got a usable workshop set up. I didn’t have much need for it as we were renting and I could (and did) have the landlord handle a lot of the maintenance, but I still felt that itch to work with my hands. In 2020 I built the most elaborate Halloween display I’ve ever done, but otherwise pretty much nothing.
Here’s the build from that Halloween. The walls are a facade on the front porch, including framing the actual kitchen window. The “iron” fence I built years before out of 1x2 boards, PVC pipe and craft foam. Alas, we will never use those walls again as they were custom build for the house we lived in at the time and don’t really work elsewhere.
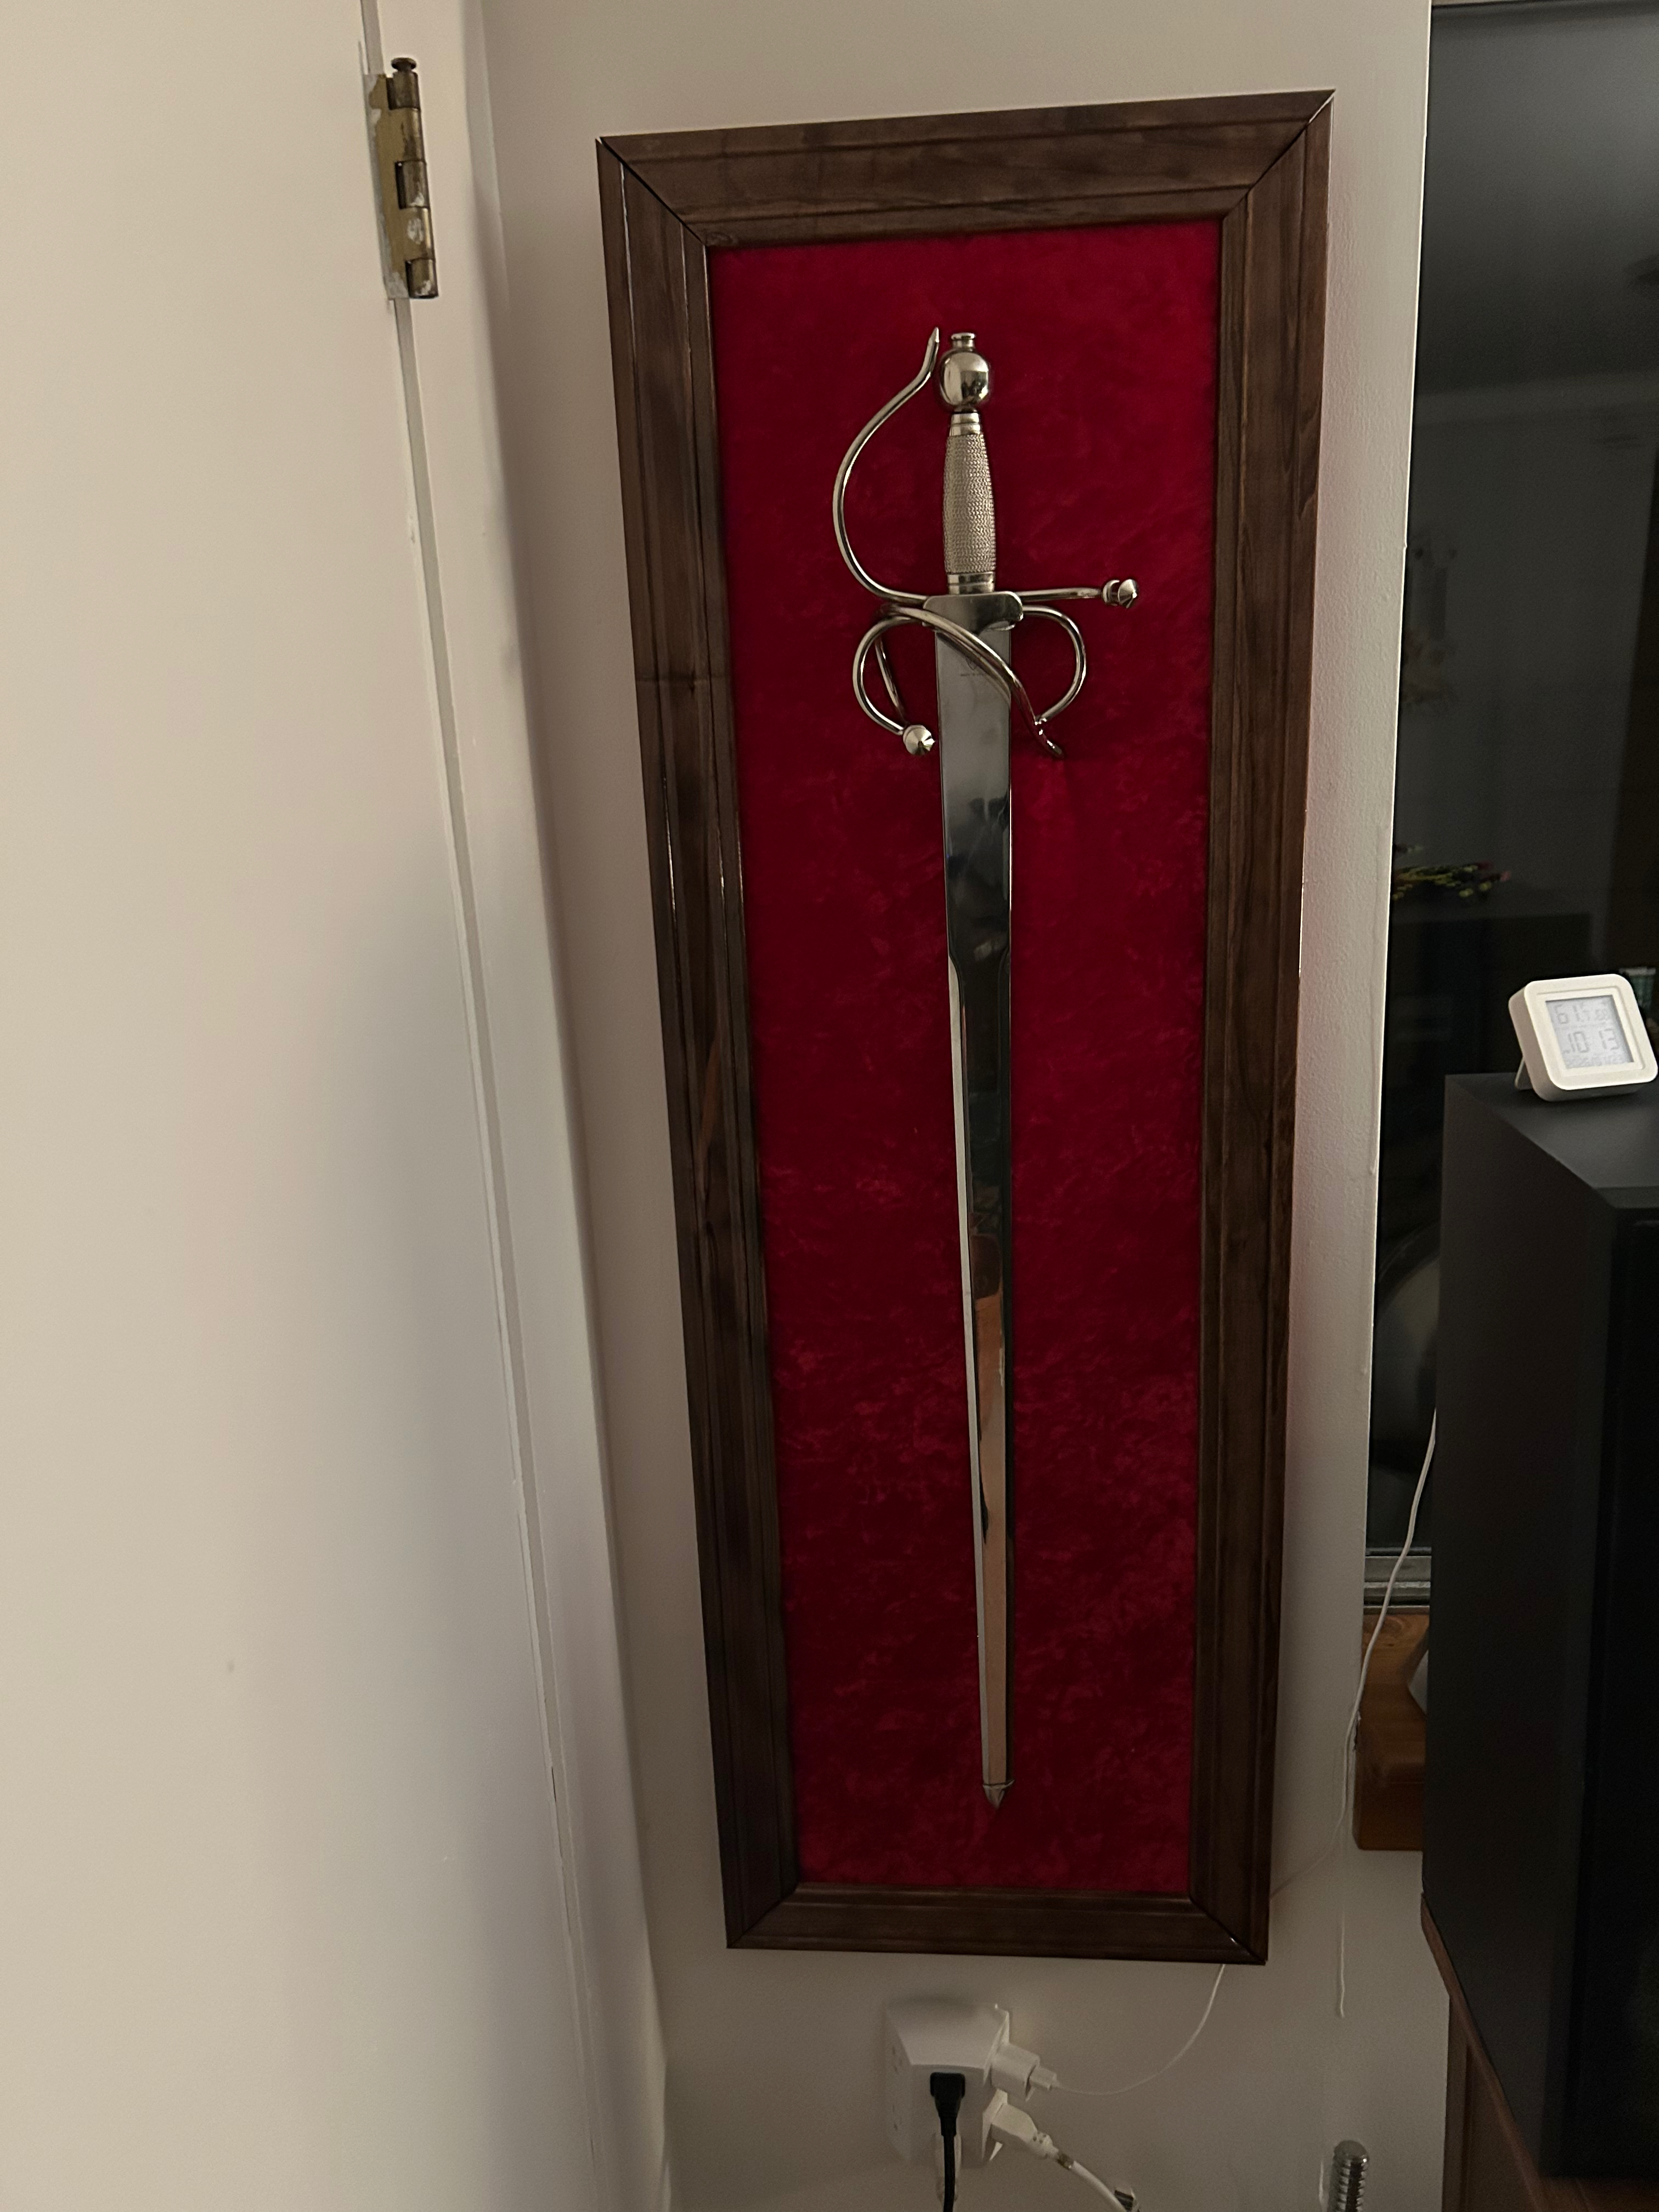
A year ago we (finally!) bought a house. It has taken a lot of time and effort, but now I have the garage in the new place set up as a usable workshop again. It’s not what I envision as the final state, but it’s getting there and I can finally start tinkering again. I took the last week off of work for some much needed R&R and it seemed like the perfect opportunity to work on something. My office still needs some decorating - the vast (for the size of the room) expanses of empty white walls begging for SOMETHING to break up the monotany. At the same time, I have a variety of swords standing ignored in the corner of the closet. I know! I’ll mount one on the wall!
The Build
I could have simply put a couple of hooks on the wall and hung the sword, but where’s the fun in that? I have childhood memories of touring historical sites like Monticello and seeing weapons mounted more purposefully and thought I should do something like that. After getting an image in my mind of what I wanted to build I started doing an inventory to see what it would take:
- It needs a sword - I already have just the one!
- I want it to have a frame
- It needs to have a backing board to support the weight of the sword in question
- The background for the sword should look opulent
The Frame
First I looked at the artwork we already have, but none of the frames were long enough to accommodate the sword. I could have cut the frames to narrow them and spliced the extra into the length, but I knew those seams would bother me every time I looked at it. I visited a couple of local salvage/reuse shops but still didn’t find either existing frames or materials that I liked for it. I also didn’t have any trim around that I wanted to use. I could have pulled some from those walls in the Halloween photo, but those are white and really wouldn’t look right against white walls. Eventually I ran across some unpainted baseboard trim that would do the trick. I cut to the size I wanted using my handy mitre saw and stained then sealed it. In this case it was one coat of stain and 3 coats of polyurethane.
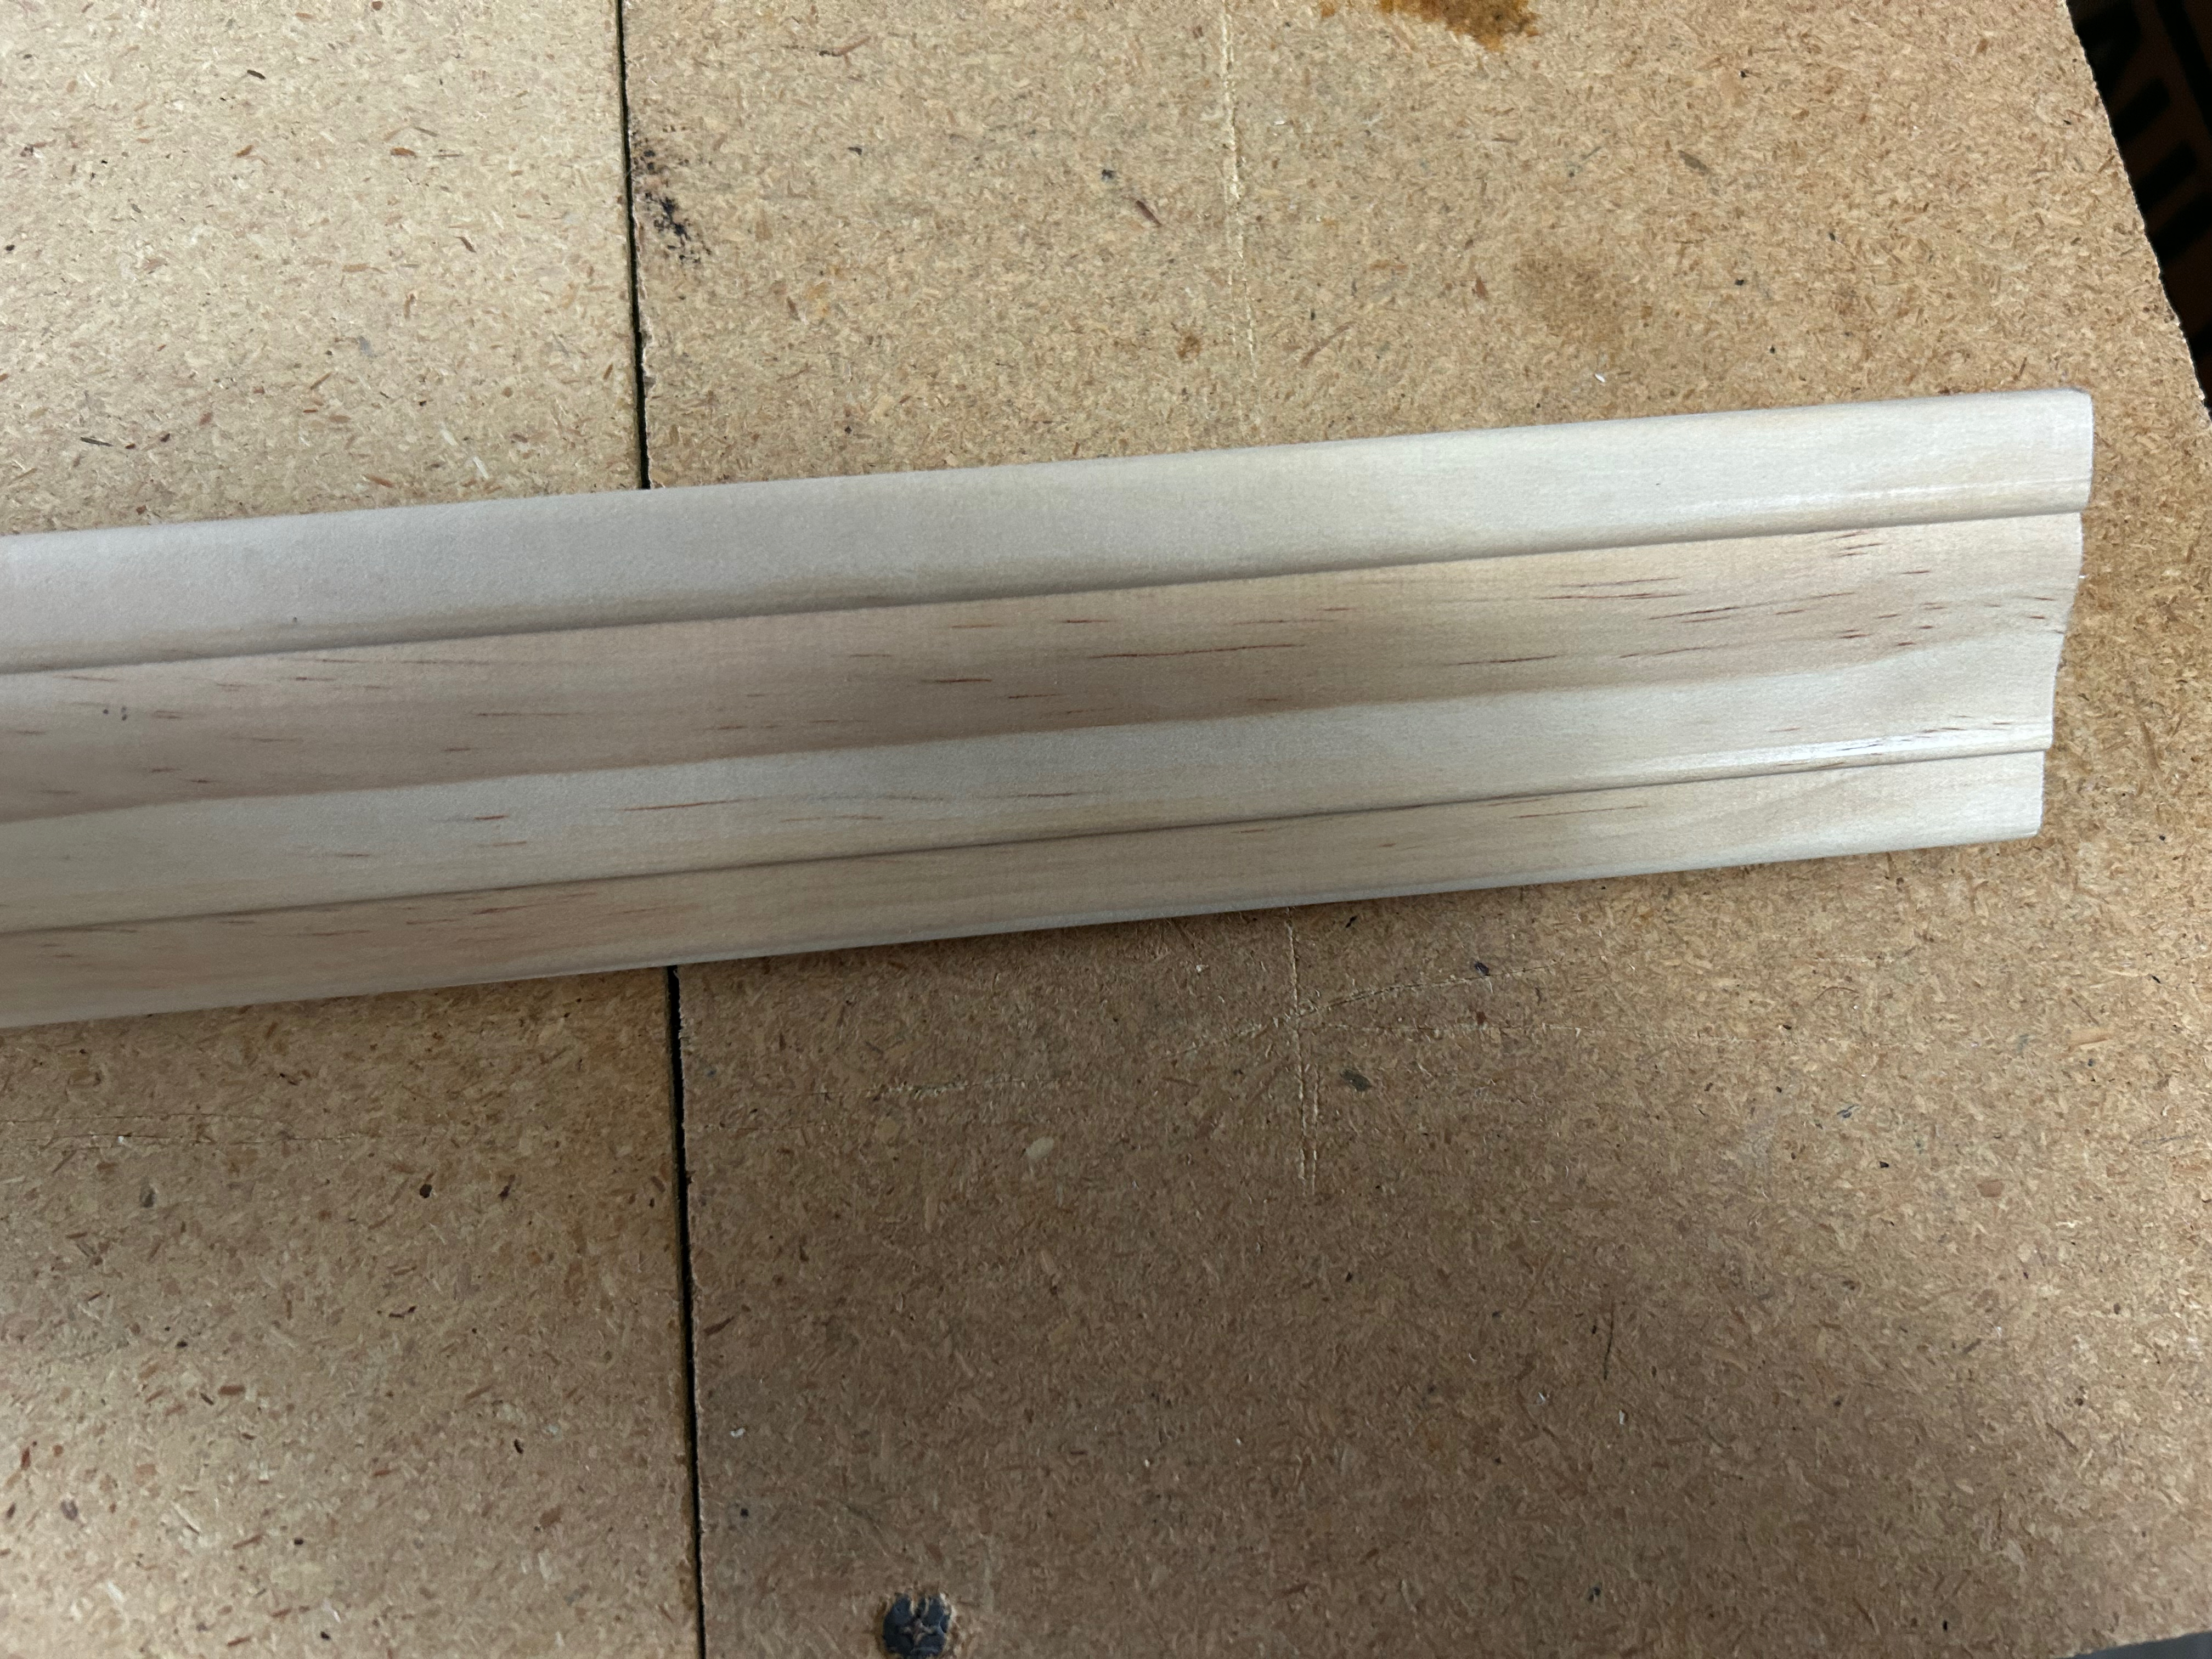
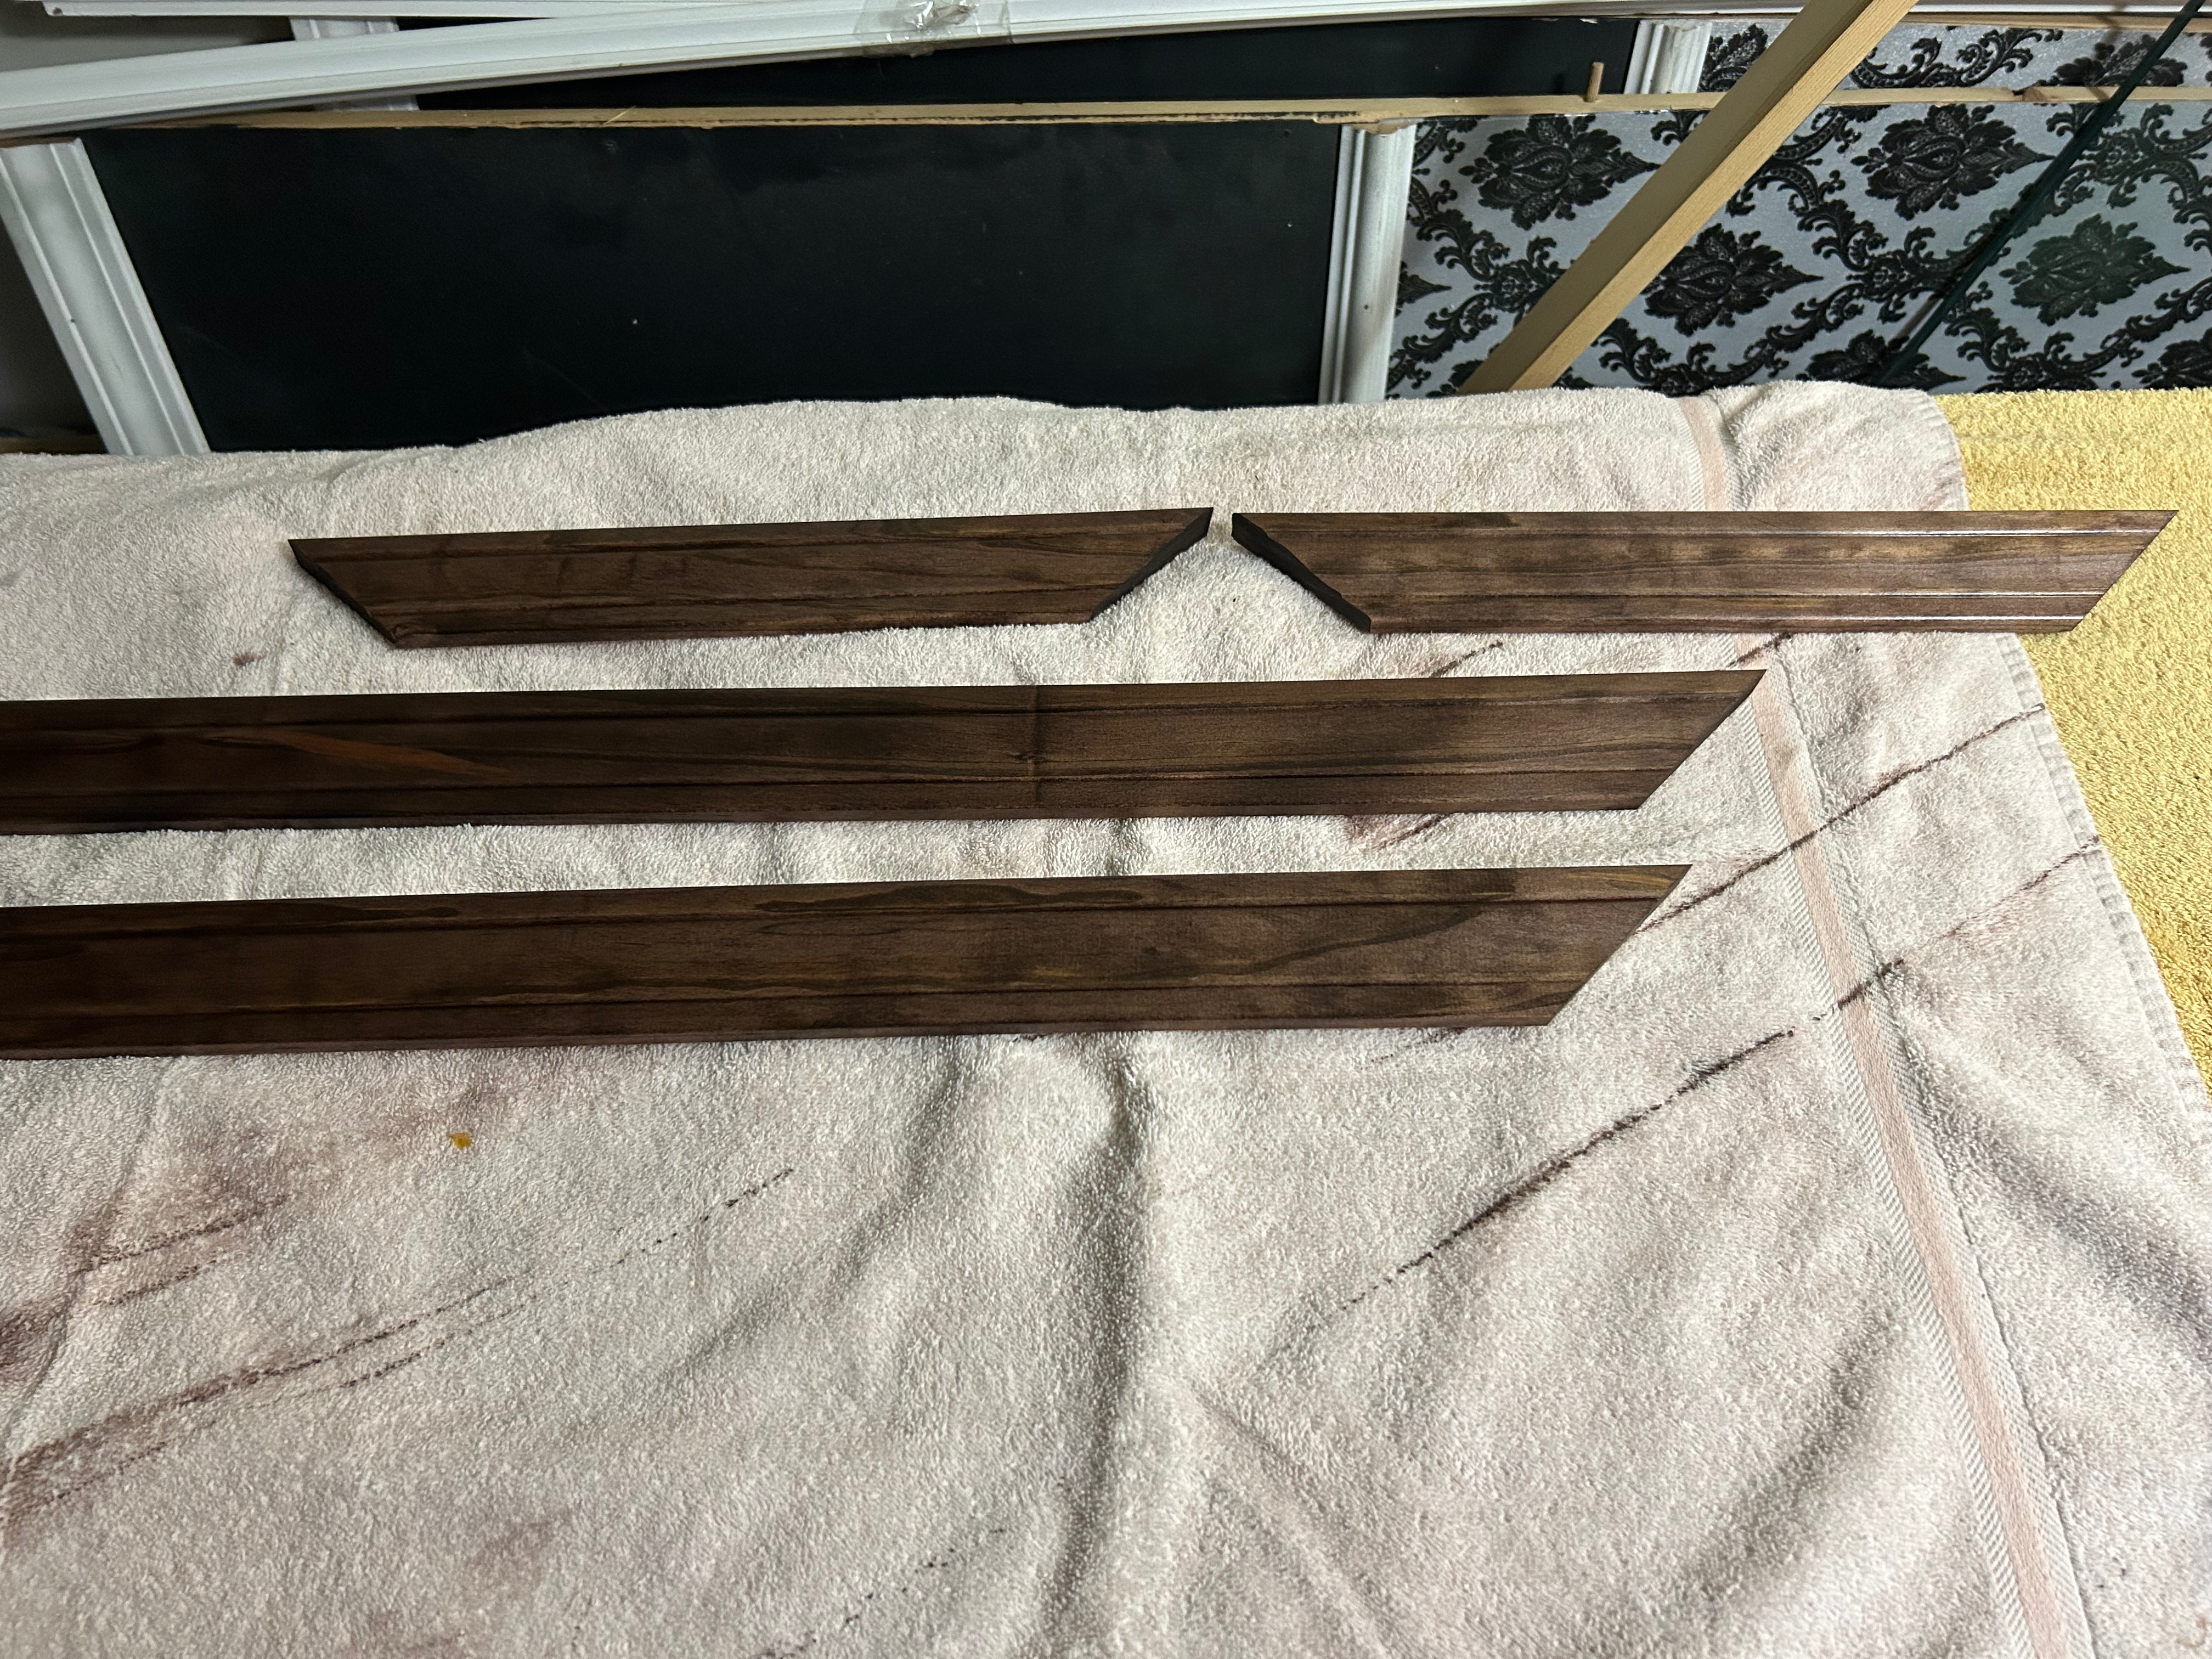
This is only the second time I’ve stained and sealed wood, so there was a lot of learning involved using some of the extra pieces I cut off to make the corners.
The Back Board
Probably the simplest part of the build, it only required a rectangular board. Turns out I didn’t have anything big enough and also thinner than 3/8” plywood. That plywood would be both too heavy and too bulky for what I want. But wait! Those walls from the Halloween build that I will never use again? I could take the luoun from one of those panels. Those are roughly 1/10” thick (it was specified in mm and I don’t recall the exact size - maybe 2.7mm?) and very light. Unfortunately, not strong enought to support this sword without bowing, so I had to double up the thickness. I rough cut 2 pieces and glued them together which ended up taking a couple of tries because the ends decided to bow apart while drying due to my negligence. I forgot to weigh them down. Once they were glued well enough (I knew there would be screws involved later), I cut the combined board to size.
The Background
This was where it helped to have a wife who was a theatrical costumer for many years. We still have a boatload of different fabrics around and I’ve picked up a few tricks from watching her over the years. In this case the trick was to cut the fabric I need from an old crushed velvet bedspread that was only being kept for exactly this kind of project. I’ve never done any upholstering before, but it turned out to be pretty easy for a simple project like this. I knew that to look right it needed some kind of cushion between the fabric and the board. In one of the outings to a reuse arts store I found some panels of batting that was just about perfect. I glued that to the board then cut it down to size. Then I cut the fabric to maybe an inch per side larger than the board, stretched it around to the back of the board and stapled in place.
Final Assembly
For final assembly I first created the frame by stapling the 4 pieces together on the back side. I’ve never done any framing before, so the corners could be tighter than they are. I also could have used my router to recess the board a bit into the frame for a cleaner look, but A) I don’t have a router table set up yet, and B) that didn’t occur to me until I went to attach the board to the frame. To attach the board I used short screws to give it a good tight fit with the beveling I wanted in the batting.
I have some leftover wire and crimp ferrules from building a garrote a many years ago for a lovely older woman (it was for theater I swear!). That wire is just the right color to become almost invisible next to the sword, so it’s perfect for this project. I marked where the wire should be to hold the sword in place and drilled holes for the wire. Quick tip: the batting can get wound around the drill bit and make it travel so it’s best to drill slowly for that. I fed through the wire around the sword at the hilt, pulled it tight and crimped it in place. Then repeat for the tip of the sword. Finally, attach some eyelets and picture wire from a set that I’ve been hauling around for entirely too long, and voila! The project is done.